You can now redirect calls to a Teams Call Queue to voicemail if there is no agent that can answer or if there is to many calls waiting in the queue already. For Auto Attendants you already have this options since a couple of months back.
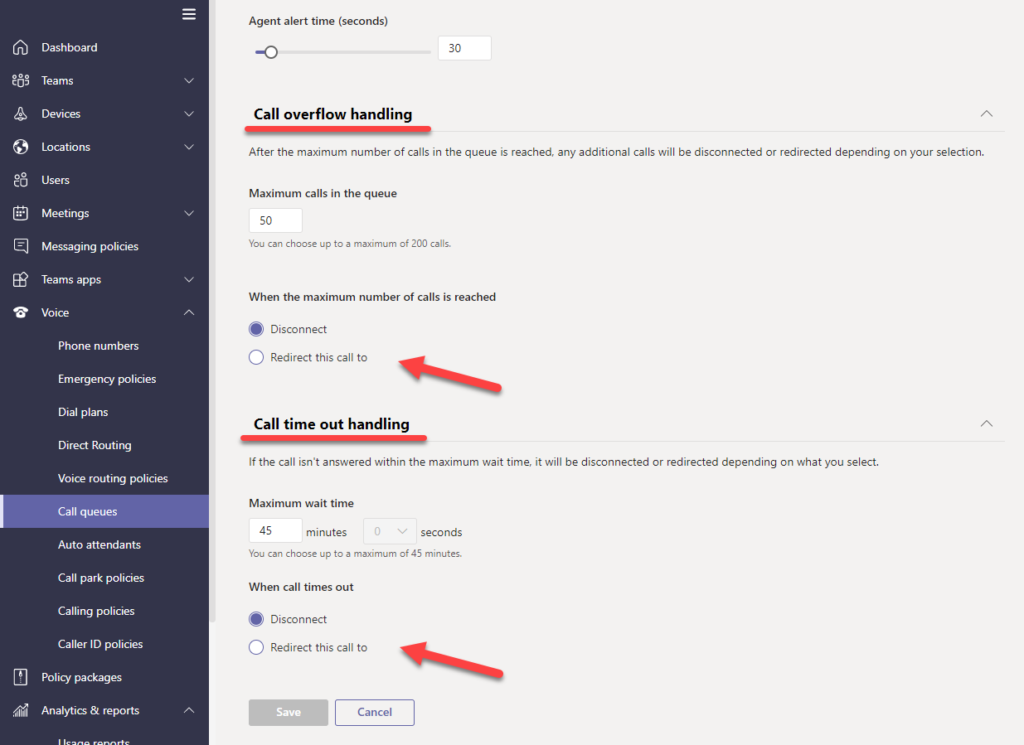
You can forward calls to voicemail with Call overflow, this is when a caller calls to your queue but there are already a maximum numbers of callers waiting in your queue. The other option is Call time out, this is used when a caller been waiting in queue for 0-45 minutes, then they will be forwarded to voicemail after the number of minutes you set.

Configure CQ with Voicemail
Open the Call Queue you want to edit in Teams Admin Center in the menu Voice > Call queues.
First make sure that you have selected a language, this will be used for greetings and prompts in your call queue and for voicemail.
- Voicemail will be stored in a Office 365 group, maybe you have one that you can reuse (there is on for each team in Teams) or you can create a new Office 365 group.

To redirect a call to voicemail select Redirect this call to and then select Voicemail in the Redirect to drop-down. In the Search for display name then search for an Office 365 group.

You have the option to upload an audio file that will be played to callers or use text to speech that will read the greeting that you write.
- Note that if you use Type in a greeting message, your message will be played followed by a voice prompt saying “Please leave a message after the tone. When you have finished, please hang up.”
- Play an audio file will play your audio file and then let the caller record a message.
The setting Transcript on/off will show a transcript of the message your caller leaved in Voicemail. The transcript will be sent in the email together with the voice file of the message to the Office 365 group mailbox.

Don’t forget to save your changes.

M365 Apps & Services MVP | Consultant work at Exobe, based in Göteborg, Sweden. Co-host of Teamspodden, co-organizer of Teamsdagen. Been working with Exchange, LCS, OCS, Lync, Skype, Teams and related stuff for a while. Mostly writing tips and news after getting questions from customers.


